After concentrating on creating my
I really struggled with making the feet of Totoro and put off doing so for a good week, until I decided to face modelling them again. My test is on the right, where I created a cylinder and attached a simple sphere to it to make a ball shaped foot. However it looked awful, so I asked Mat again for help. On the right is the example foot he made to show me how I could create one using deformers.
Mat then showed me how it could be possible to animate the feet that he created. Although this looks perfect for the style of animation I am going for, it doesn't quite suit my character and seems too delicate. So I set out to try and create my own in a similar way.
First I tried using the extrude tool to create the toes by pulling them out of the cylinder, but it didn't look anything like what I wanted.
I then decided to create a sphere which I squashed slightly and deleted the bottom of until I had the right sort of toe shape I was aiming for.
Only then did I add the cylinder for the leg, where I then resized the toes until I had what I wanted.
I then deleted a few of the faces from the foot section which were still over hanging where I didn't delete them properly when selecting the whole bottom.
All I needed to do was fill in the bottom...
And presto the feet were then done!!!!
Which means that the model of Totoro was finally complete!!
(apart from colour.....) Which then brings me onto colour....! Here he is uncoloured, showing his basic shape (which was made from different components making it easier to animate without an armature).
This model was just basically shaded using the hypershade tool, in two tones of grey, one a darker grey for the body, and a lighter off white for the belly highlights. His nose has been coloured with a brown blinn (after this screen shot was taken) to add extra shine and make him feel more like a toy.
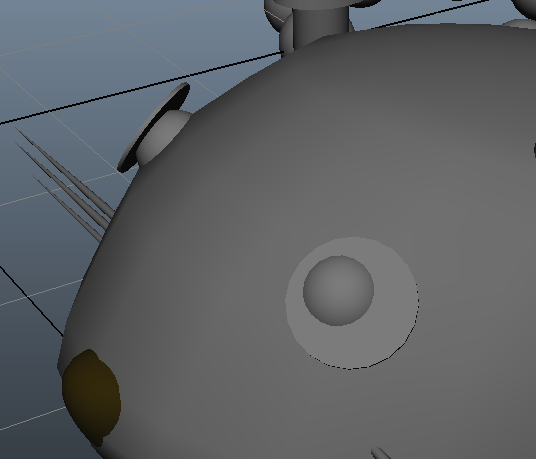
All that was left to create was his eyes, which was a simple case of flattening a sphere with a lambert texturing and adding a smaller unflattened sphere with a blinn texture in the middle for extra shine.
I had difficulty trying to get the eyes in the right position, as from some angles it looked perfect and finished, and then I would change the view and it would be all crazy like above! So it took me some time to find a good rotation for it to look flat at all angles. It was then just a duplicating job once I had sorted one eye, and then flip it to match on the other side.
Here are my finished eyes once I had managed to place the eyes in the right place on my model, with it flat to his face from all angles, and rotated to the right position.
All that was left to colour his eyes, which was a simple case of using a lambert texturing for the outer whites of the eyes and adding a blinn texture to the middle of the eyes for extra shine.
Here is my finished Totoro Model. I am actually really proud of him, considering how much I initially (and still do) struggled with


No comments:
Post a Comment